1600 Lumen Trionic LED Front Light with Battery Pack

This manual both shows how you attach the light holder and the light on a Walker (left column below) and also how you attach them on a Veloped (right column below).

In the left-hand photo, A shows the holder attachment parts for a Walker (2 screws + 2 washers). B shows the holder attachment parts for a Veloped (1 screw + 1 knurled nut + 1 nut).

1600 Lumen Trionic LED Front Light with Battery Pack

Attaching the Light Holder

Instructions for a Walker
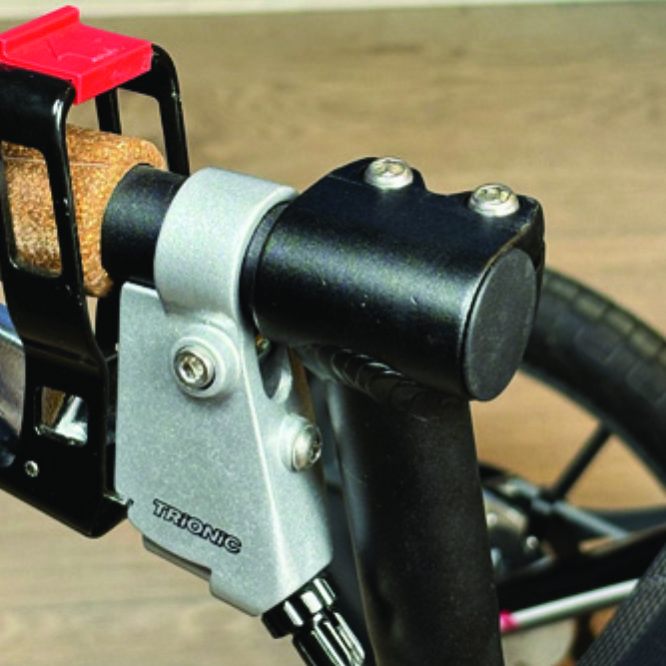
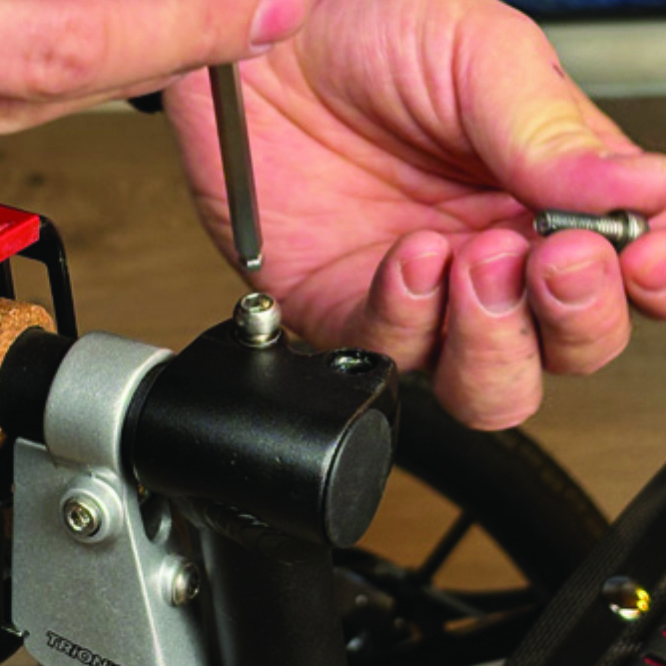
On top of the black semi-vertical tube, locate the two screws that clamp the grip tube, situated in front of the brake lever.
A1. On top of the black semi-vertical tube, locate the two screws that clamp the grip tube, situated in front of the brake lever.
Loosen both screws with the 5mm allen key included with the LED light.
A2. Loosen both screws with the 5mm allen key included with the LED light.
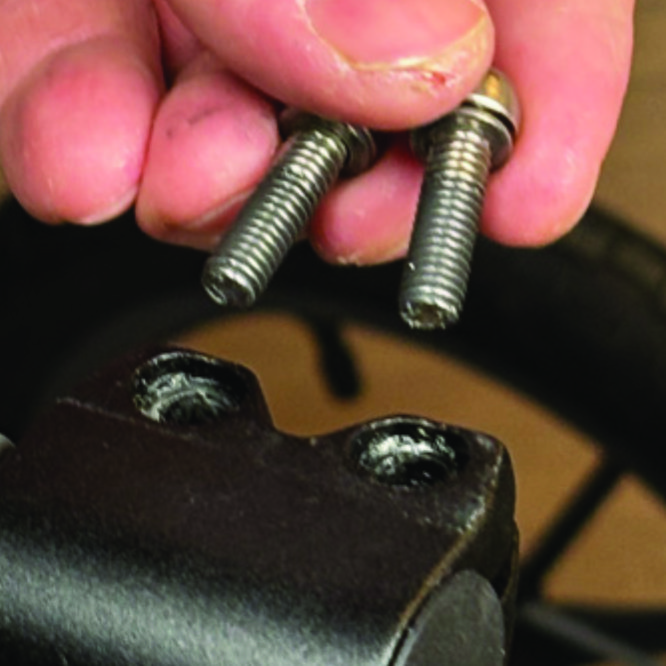
Remove the two screws from the grip clamp.
A3. Remove the two screws from the grip clamp.
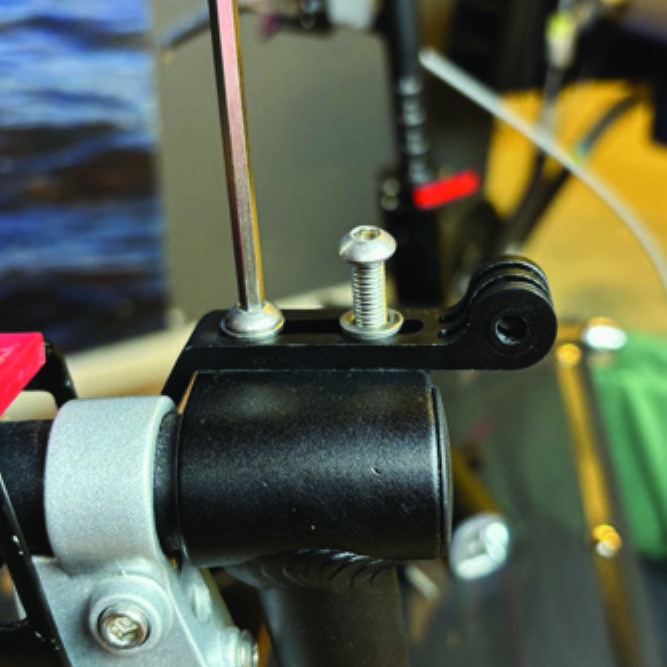
Place the light holder on top of the grip clamp, with its circular and slotted light attachment pointing forwards and upwards. Enter the two screws with washers into the holes of the clamp.
A4. Place the light holder on top of the grip clamp, with its circular and slotted light attachment pointing forwards and upwards. Enter the two screws with washers into the holes of the clamp.
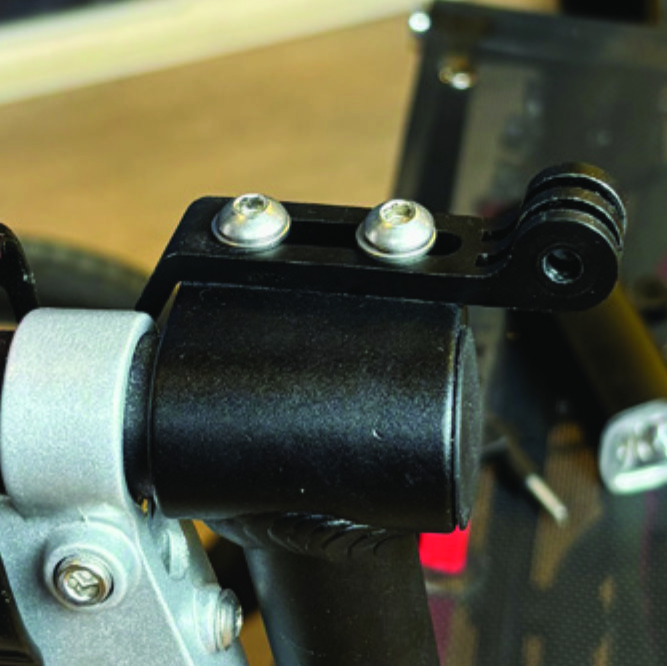
Tighten the two screws with the 5mm allen key. NOTE: It is important that you tighten the screws properly as they secure the grip tube with its rubber grip and brake lever.
A5. Tighten the two screws with the 5mm allen key. NOTE: It is important that you tighten the screws properly as they secure the grip tube with its rubber grip and brake lever.

Instructions for a Veloped

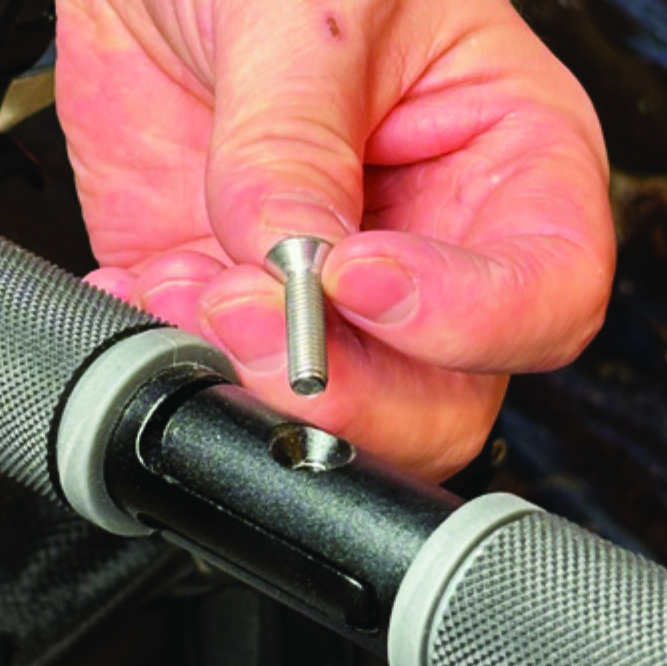
Locate the screw at the center folding hinge of the U-shaped grip bar of the Veloped. Unscrew the screw with the included 4mm allen key and remove it.
A1. Locate the screw at the center folding hinge of the U-shaped grip bar of the Veloped. Unscrew the screw with the included 4mm allen key and remove it.
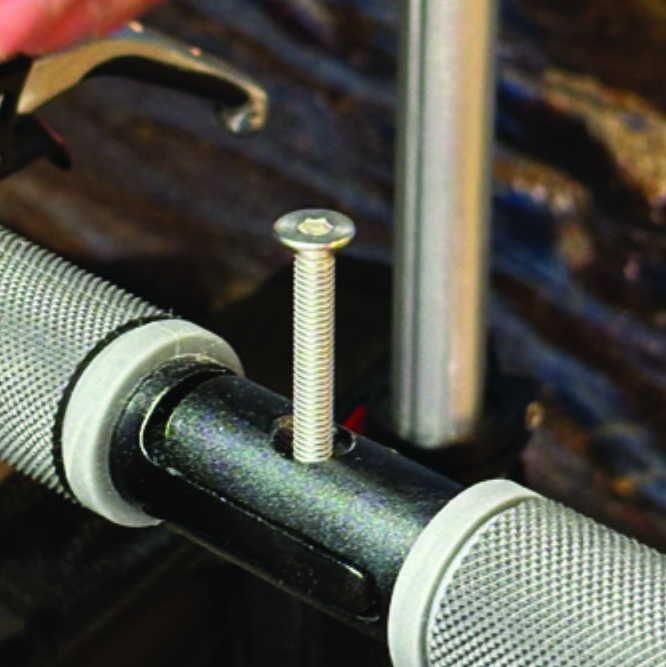
Replace the old screw with the longer screw included with the LED light. Attach the longer screw to the hinge and tighten it with the 4mm allen key.
B2. Replace the old screw with the longer screw included with the LED light. Attach the longer screw to the hinge and tighten it with the 4mm allen key.
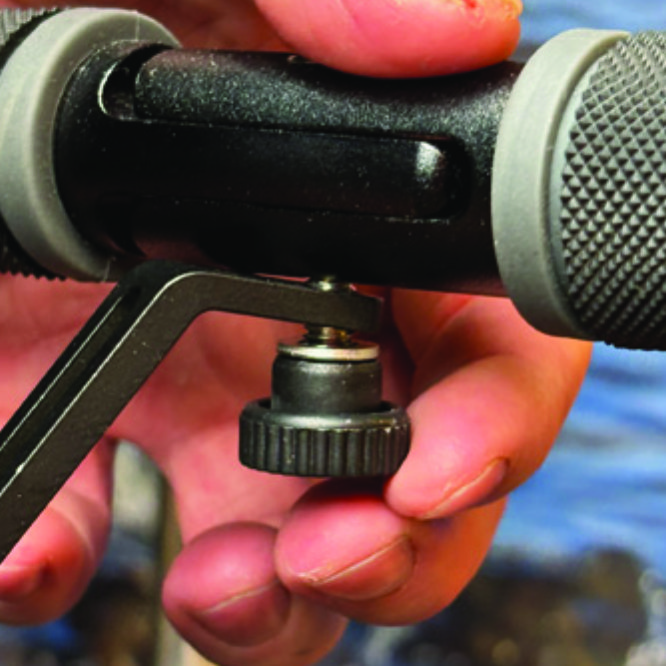
Attach the short angled end of the light holder to the lower end of the screw, on the downside of the grip bar. Fasten the holder with one washer and the knurled nut.
B3. Attach the short angled end of the light holder to the lower end of the screw, on the downside of the grip bar. Fasten the holder with one washer and the knurled nut.
For a more secure holder attachment, avoiding the holder to unintentionally turn sideways, replace the knurled nut with the included stainless steel nut and tighten it with a 10mm spanner.
B4. For a more secure holder attachment, avoiding the holder to unintentionally turn sideways, replace the knurled nut with the included stainless steel nut and tighten it with a 10mm spanner.
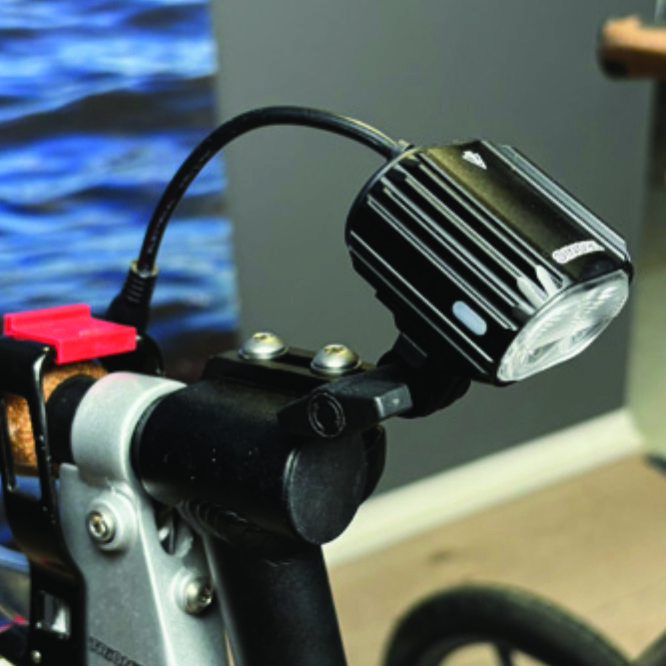
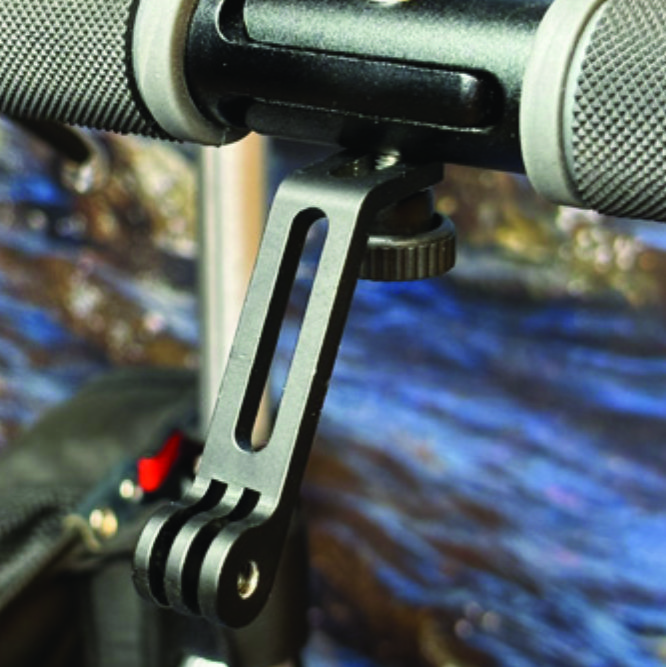
This photo shows the light holder as correctly attached.
B5. This photo shows the light holder as correctly attached.

Attaching the LED Light to the Holder

Instructions for a Walker
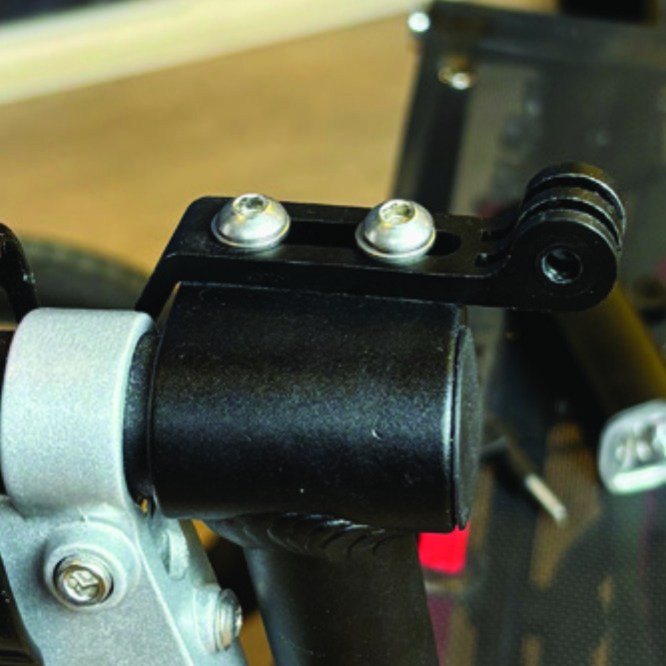
Identify the circular front end of the light holder, with two slots for attaching the light.
A6. Identify the circular front end of the light holder, with two slots for attaching the light.
Push the slotted bracket of the light into the slots of the holder and make sure they are aligned. Seen in the traveling direction of the Walker, enter the included wingnut from the left and tighten it.
A7. Push the slotted bracket of the light into the slots of the holder and make sure they are aligned. Seen in the traveling direction of the Walker, enter the included wingnut from the left and tighten it.

Instructions for a Veloped

Locate the screw at the center folding hinge of the U-shaped grip bar of the Veloped. Unscrew the screw with the included 4mm allen key and remove it.
B6. Locate the screw at the center folding hinge of the U-shaped grip bar of the Veloped. Unscrew the screw with the included 4mm allen key and remove it.
Identify the circular front end of the light holder, with two slots for attaching the light.
B7. Identify the circular front end of the light holder, with two slots for attaching the light.

Placing the Battery Pack

Instructions for a Walker
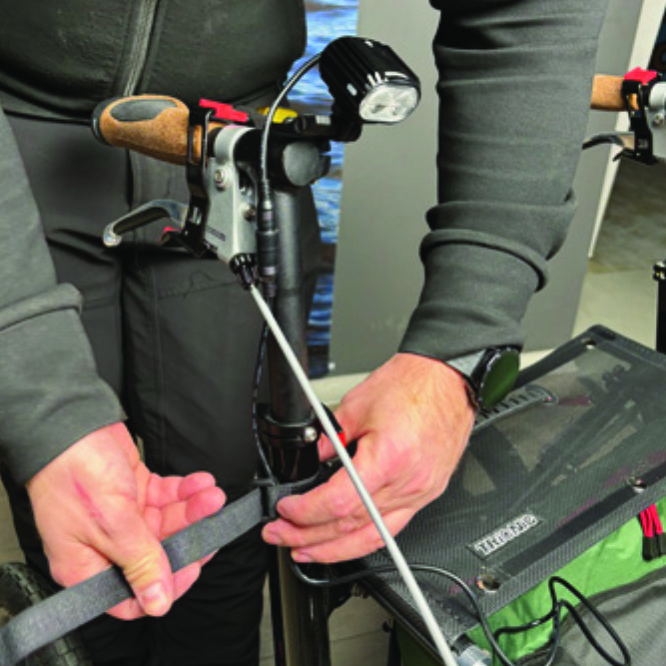
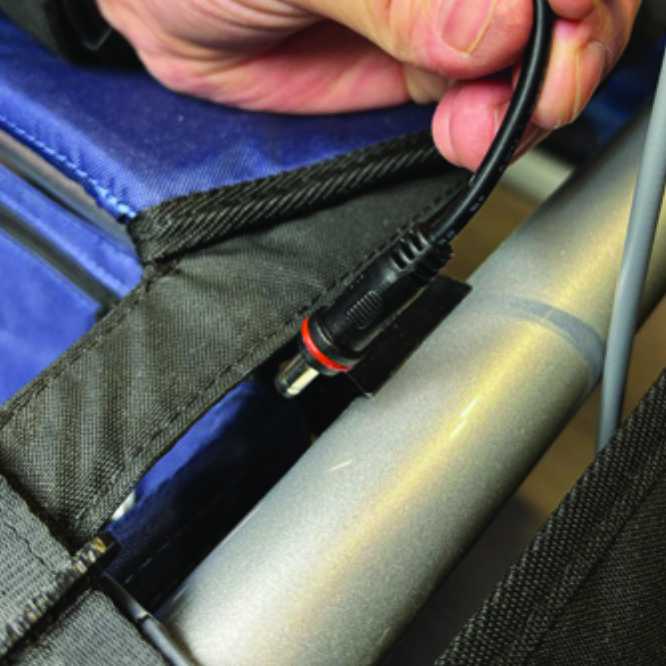
Run the longer extension cable along the semi-vertical grip tube of the Walker and secure it with the included velcro strap.
A8. Run the longer extension cable along the semi-vertical grip tube of the Walker and secure it with the included velcro strap.
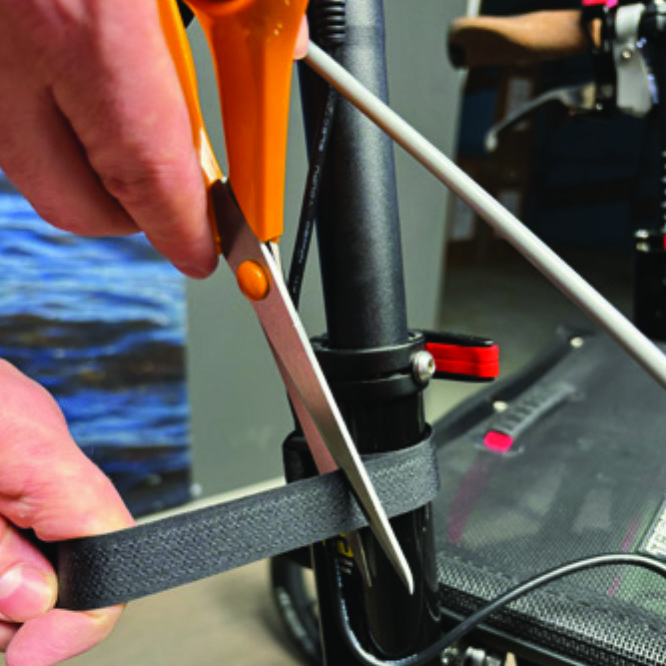
You can cut the excessive length of the velcro strap with a pair of scissors.
A9. You can cut the excessive length of the velcro strap with a pair of scissors.
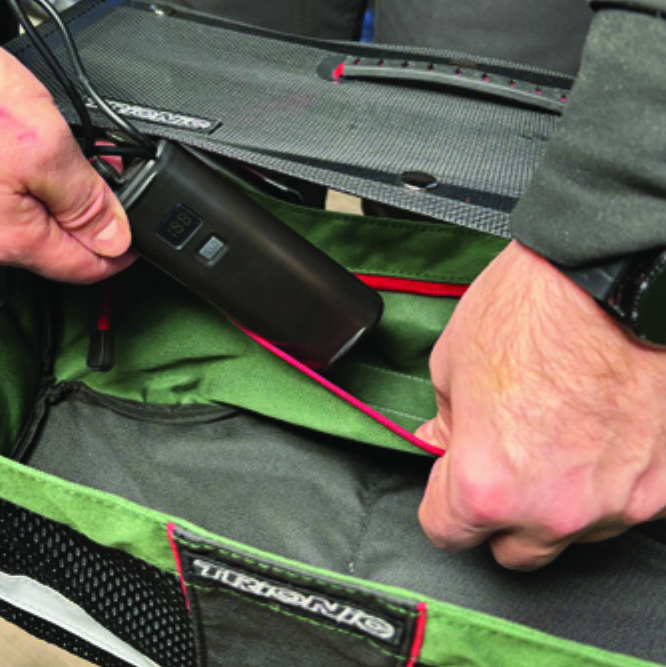
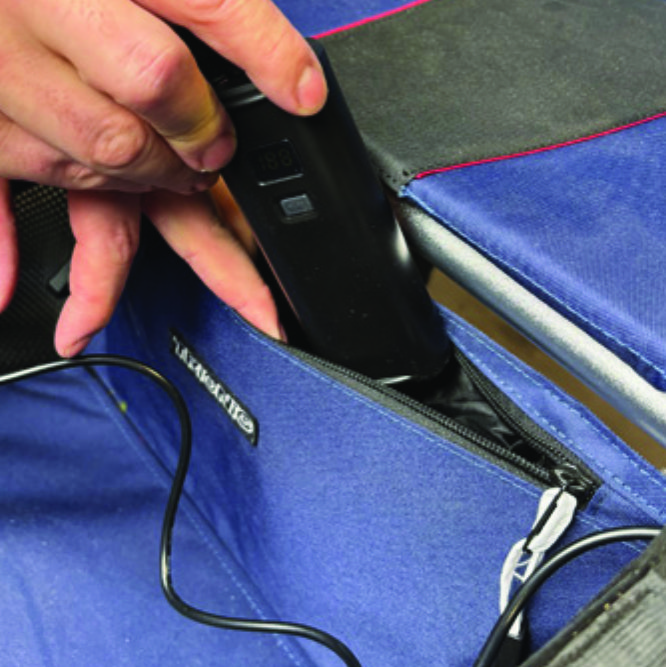
Place the battery pack in the rear zippered pocket of the basket.
A10. Place the battery pack in the rear zippered pocket of the basket.

Instructions for a Veloped

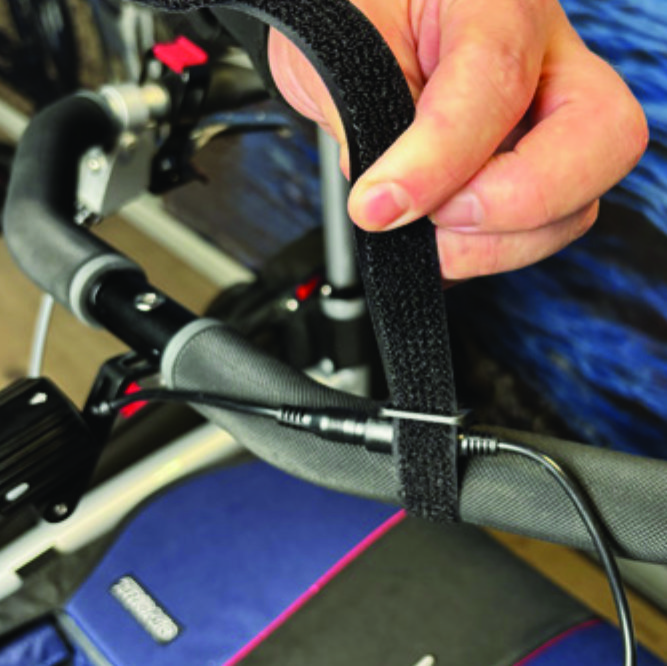
Run the longer extension cable along the U-shaped grip bar of the Veloped and secure it with the included velcro strap.
B8. Run the longer extension cable along the U-shaped grip bar of the Veloped and secure it with the included velcro strap.
You can cut the excessive length of the velcro strap with a pair of scissors.
B9. You can cut the excessive length of the velcro strap with a pair of scissors.
Place the battery pack in the rear zippered pocket of the basket.
B10. Place the battery pack in the rear zippered pocket of the basket.

The package contains

The package contains

How to operate the light

How to operate the light

Product Reviews    

  • Trionic Walker 14er is great for walking on……

    Trionic Walker 14er is great for walking on rough and unpaved streets. With this, I have increased my speed and distance. I added a bicycle speedometer/odometer to monitor my speed and distance. A great improvement over my 8-inch indoor walker.…

  • Veloped…

    Very good aid for walking…

  • Delighted…

    Delighted with my Veloped Trionic. It has totally exceeded my expectations.
    It takes obstacles in its stride. Very comfortable on the arms, easy to manoeuvre. Simple to remove and replace wheels for putting in the car.
    Very happy.…

  • Navigate rough terrain…

    The product arrived within days of ordering, which amazed us since it came from Sweden. We are very happy with the product and would recommend it to others needing a mobility device that can navigate rough terrain.…

  • Veloped Sport…

    Truly an outstanding mobility aid. Very well constructed. It will truly allow you to go anywhere. It is happy on tarmac, trail and off-trail. It has enabled me to participate again in the weekly 5 K parkrun.…

  • We are very satisfied!…

    The Walker is perfectly suited for cobblestones and is very easy to handle! It is more flexible than the conventional walkers and offers much more comfort; we are highly satisfied!…

  • Absolutely amazing service to the needs of the mobility challenged!…

    To me, the most amazing thing about the Trionic company is that the inventor of Trionic products (the Veloped and the Walker), Stefan Kindberg, is so available to serve the customers for these remarkable devices. He personally sees to it that they ar…

  • PERFECT…

    Perfect, because you can walk upright and avoid walking with a bent back. The back improves the more you walk.
    A tip: When folding the Veloped, there should be a latch that keeps the frame locked in a folded state.
    Missing holes to put a nameplate …

  • Back On My Feet Again…

    I have nerve damage in my left leg from a back issue and over two years had regressed to using a cane. My daily walks with my dog consisted of a painful quarter of a mile and I spent more and more of my time sitting. As someone who had been very ph…

Subscribe to our newsletter!