1600 Lumen Trionic LED Front Light with Battery Pack

This manual both shows how you attach the light holder and the light on a Walker (left column below) and also how you attach them on a Veloped (right column below).

In the left-hand photo, A shows the holder attachment parts for a Walker (2 screws + 2 washers). B shows the holder attachment parts for a Veloped (1 screw + 1 knurled nut + 1 nut).

1600 Lumen Trionic LED Front Light with Battery Pack

Attaching the Light Holder

Instructions for a Walker
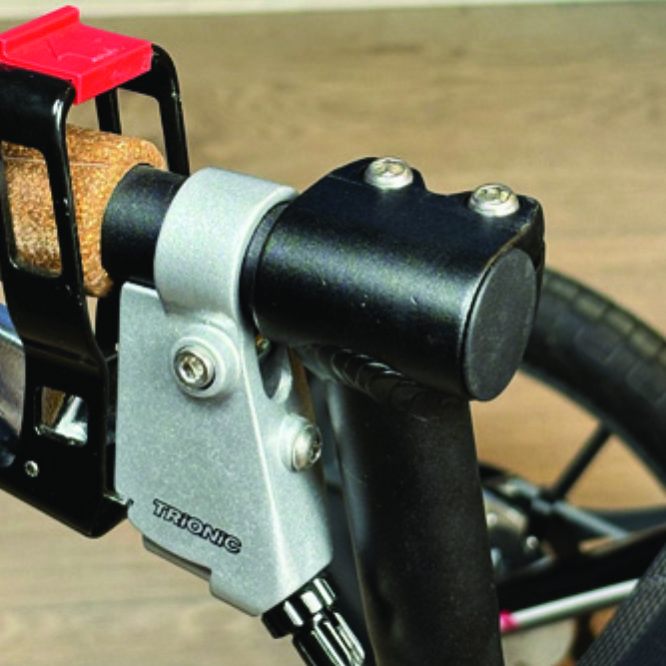
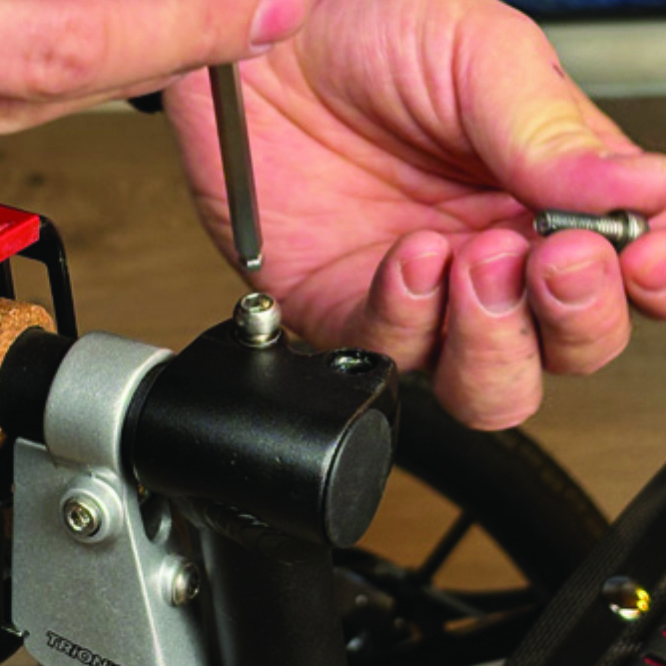
On top of the black semi-vertical tube, locate the two screws that clamp the grip tube, situated in front of the brake lever.
A1. On top of the black semi-vertical tube, locate the two screws that clamp the grip tube, situated in front of the brake lever.
Loosen both screws with the 5mm allen key included with the LED light.
A2. Loosen both screws with the 5mm allen key included with the LED light.
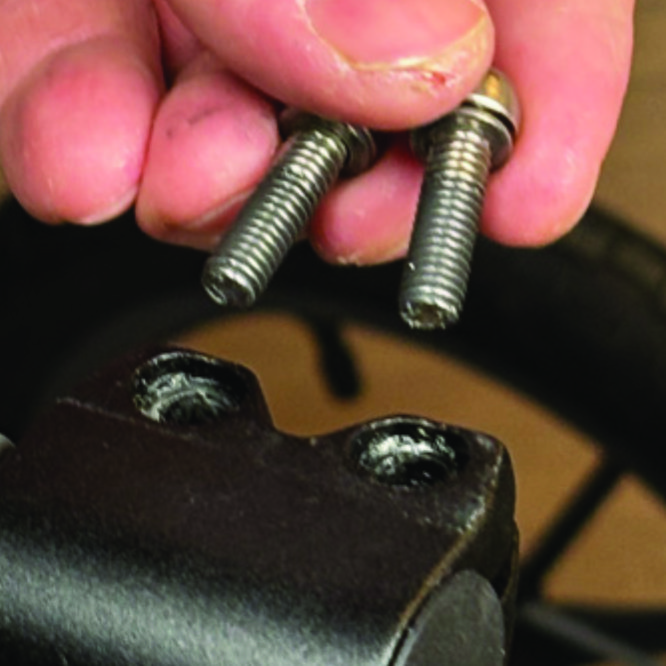
Remove the two screws from the grip clamp.
A3. Remove the two screws from the grip clamp.
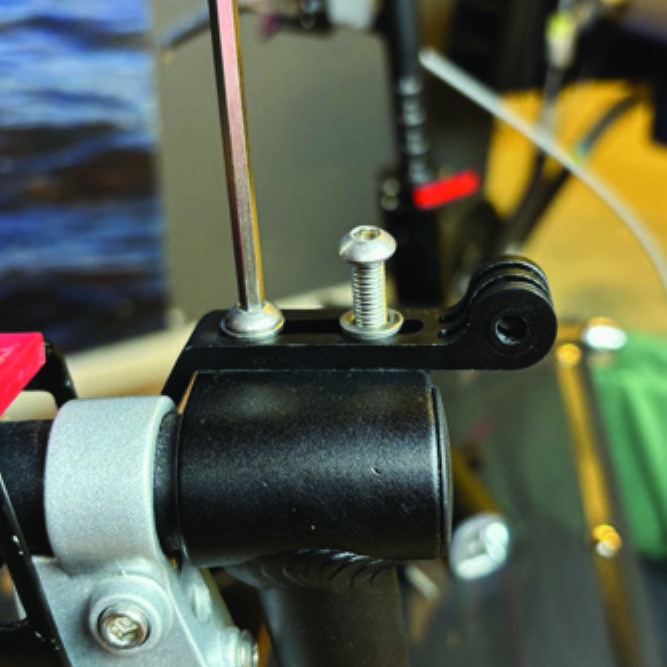
Place the light holder on top of the grip clamp, with its circular and slotted light attachment pointing forwards and upwards. Enter the two screws with washers into the holes of the clamp.
A4. Place the light holder on top of the grip clamp, with its circular and slotted light attachment pointing forwards and upwards. Enter the two screws with washers into the holes of the clamp.
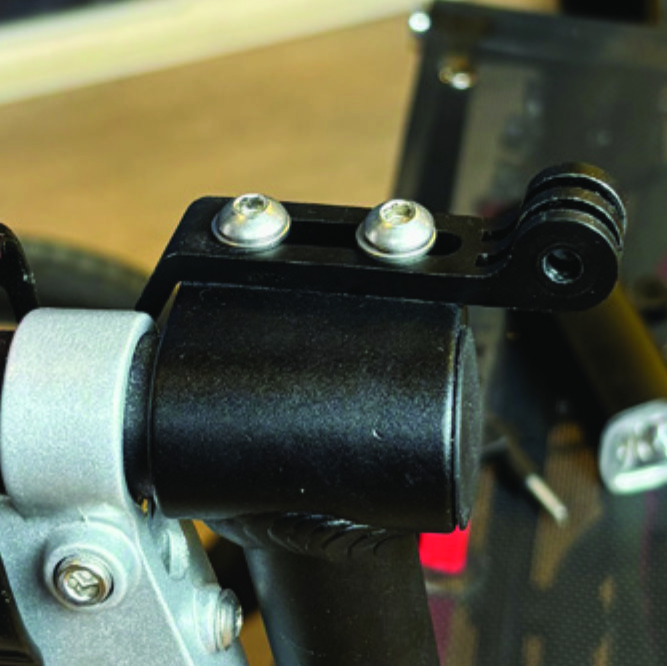
Tighten the two screws with the 5mm allen key. NOTE: It is important that you tighten the screws properly as they secure the grip tube with its rubber grip and brake lever.
A5. Tighten the two screws with the 5mm allen key. NOTE: It is important that you tighten the screws properly as they secure the grip tube with its rubber grip and brake lever.

Instructions for a Veloped

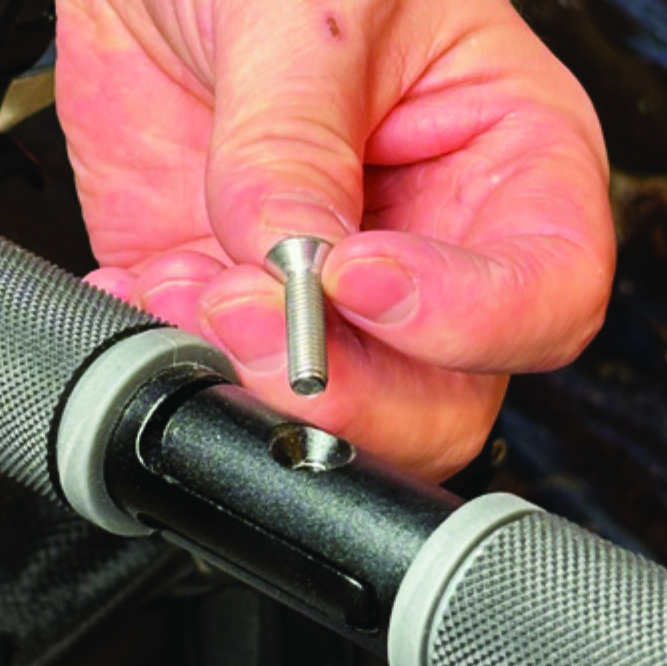
Locate the screw at the center folding hinge of the U-shaped grip bar of the Veloped. Unscrew the screw with the included 4mm allen key and remove it.
A1. Locate the screw at the center folding hinge of the U-shaped grip bar of the Veloped. Unscrew the screw with the included 4mm allen key and remove it.
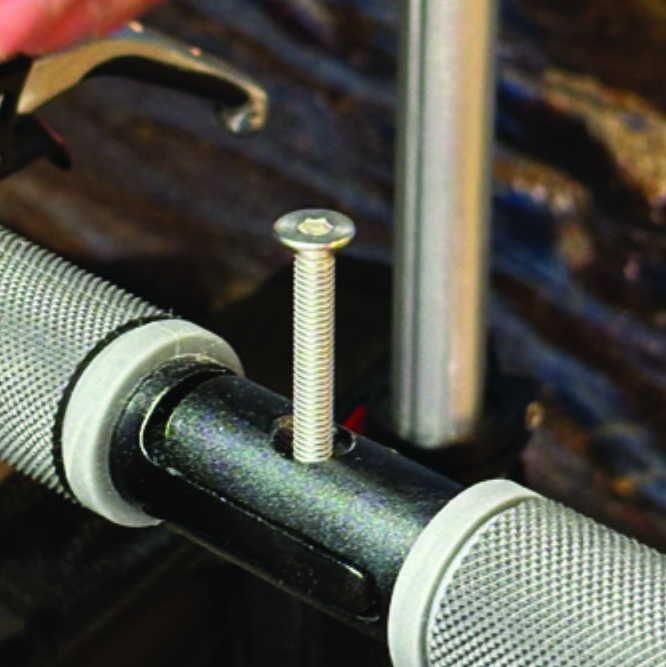
Replace the old screw with the longer screw included with the LED light. Attach the longer screw to the hinge and tighten it with the 4mm allen key.
B2. Replace the old screw with the longer screw included with the LED light. Attach the longer screw to the hinge and tighten it with the 4mm allen key.
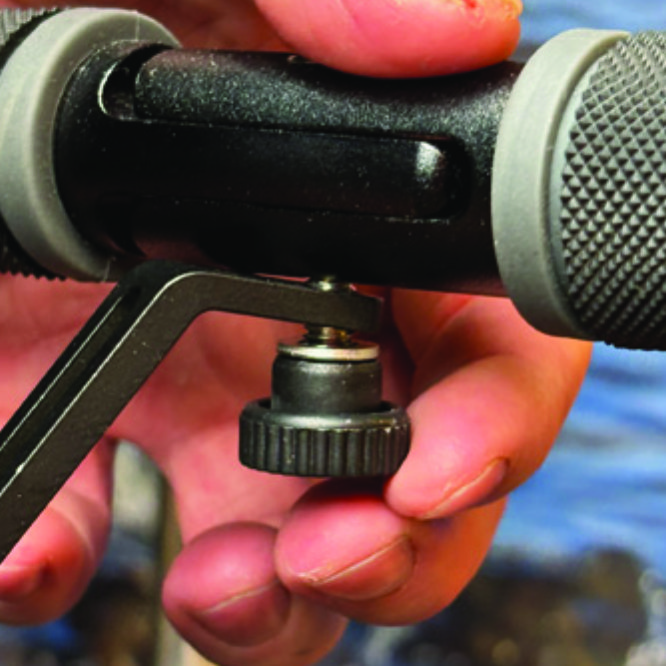
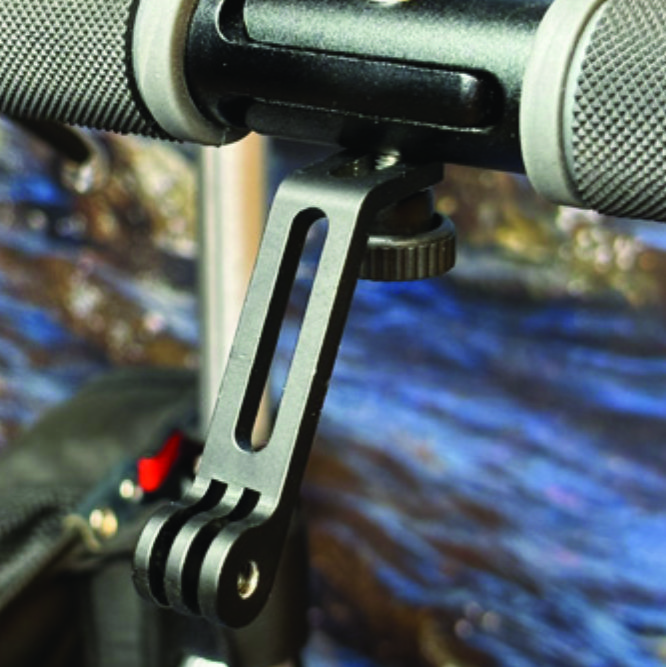
Attach the short angled end of the light holder to the lower end of the screw, on the downside of the grip bar. Fasten the holder with one washer and the knurled nut.
B3. Attach the short angled end of the light holder to the lower end of the screw, on the downside of the grip bar. Fasten the holder with one washer and the knurled nut.
For a more secure holder attachment, avoiding the holder to unintentionally turn sideways, replace the knurled nut with the included stainless steel nut and tighten it with a 10mm spanner.
B4. For a more secure holder attachment, avoiding the holder to unintentionally turn sideways, replace the knurled nut with the included stainless steel nut and tighten it with a 10mm spanner.
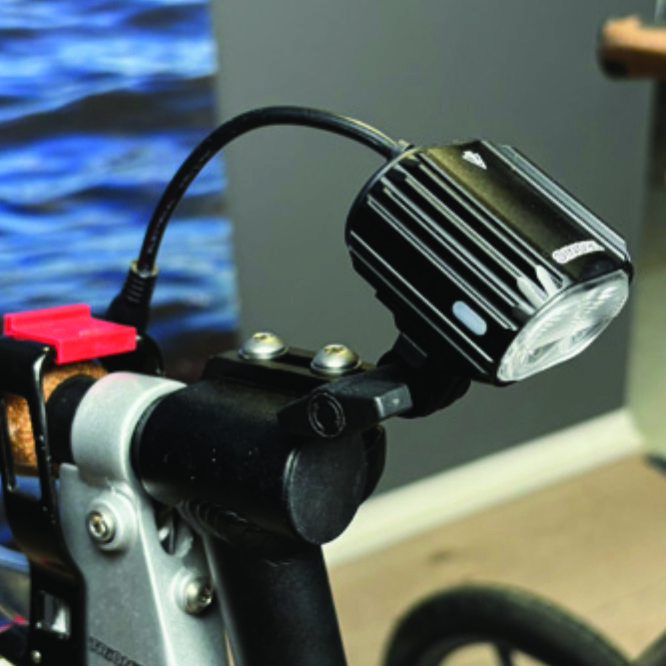
This photo shows the light holder as correctly attached.
B5. This photo shows the light holder as correctly attached.

Attaching the LED Light to the Holder

Instructions for a Walker
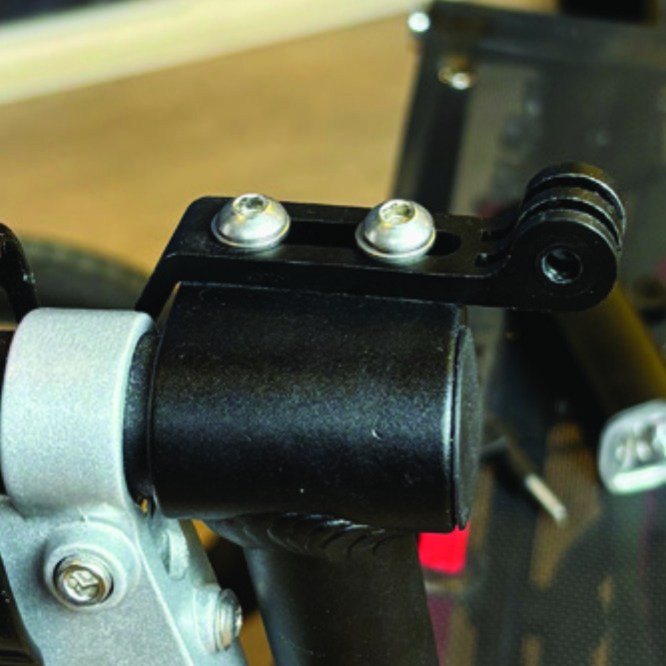
Identify the circular front end of the light holder, with two slots for attaching the light.
A6. Identify the circular front end of the light holder, with two slots for attaching the light.
Push the slotted bracket of the light into the slots of the holder and make sure they are aligned. Seen in the traveling direction of the Walker, enter the included wingnut from the left and tighten it.
A7. Push the slotted bracket of the light into the slots of the holder and make sure they are aligned. Seen in the traveling direction of the Walker, enter the included wingnut from the left and tighten it.

Instructions for a Veloped

Locate the screw at the center folding hinge of the U-shaped grip bar of the Veloped. Unscrew the screw with the included 4mm allen key and remove it.
B6. Locate the screw at the center folding hinge of the U-shaped grip bar of the Veloped. Unscrew the screw with the included 4mm allen key and remove it.
Identify the circular front end of the light holder, with two slots for attaching the light.
B7. Identify the circular front end of the light holder, with two slots for attaching the light.

Placing the Battery Pack

Instructions for a Walker
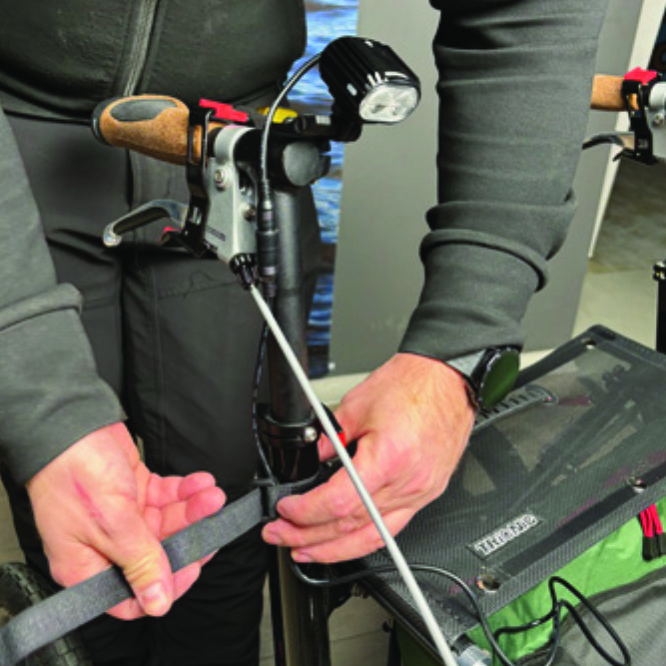
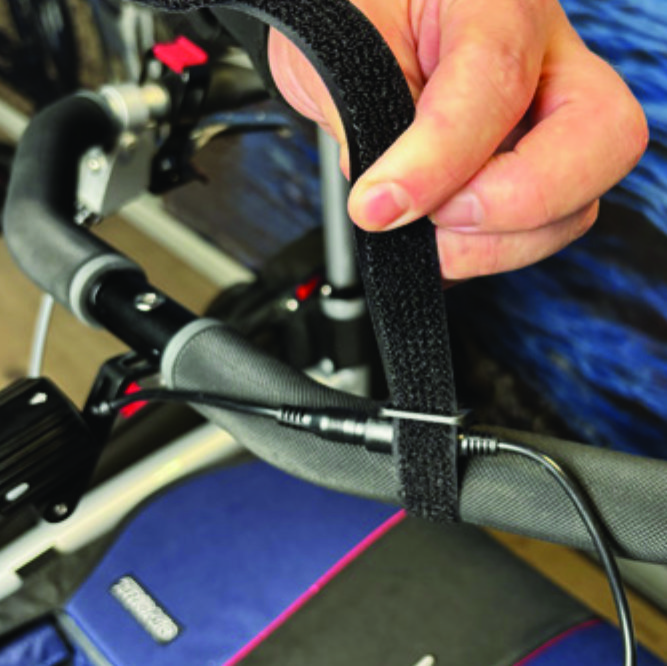
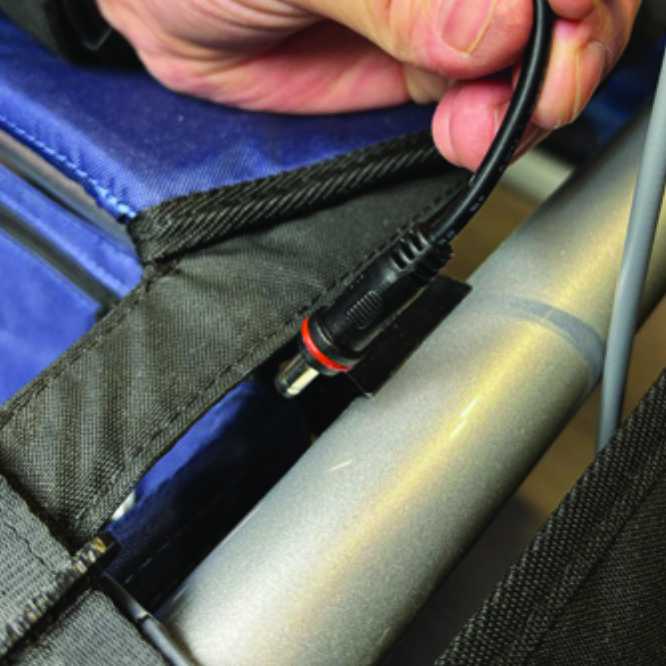
Run the longer extension cable along the semi-vertical grip tube of the Walker and secure it with the included velcro strap.
A8. Run the longer extension cable along the semi-vertical grip tube of the Walker and secure it with the included velcro strap.
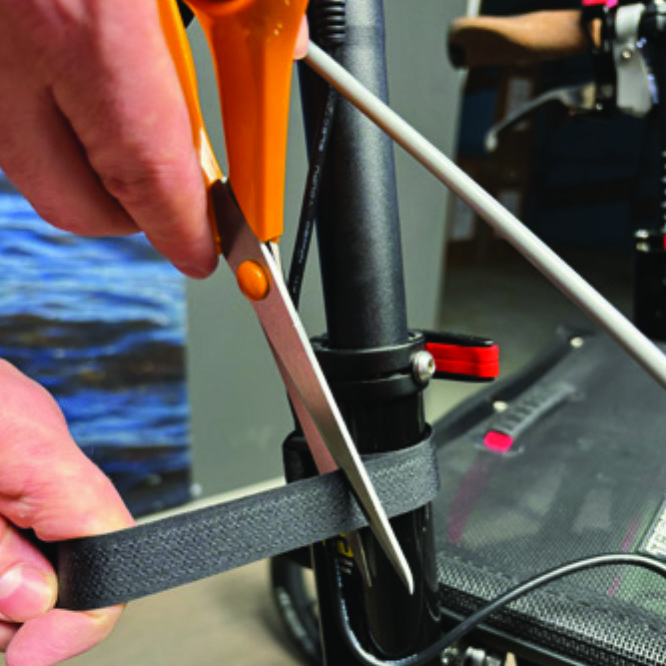
You can cut the excessive length of the velcro strap with a pair of scissors.
A9. You can cut the excessive length of the velcro strap with a pair of scissors.
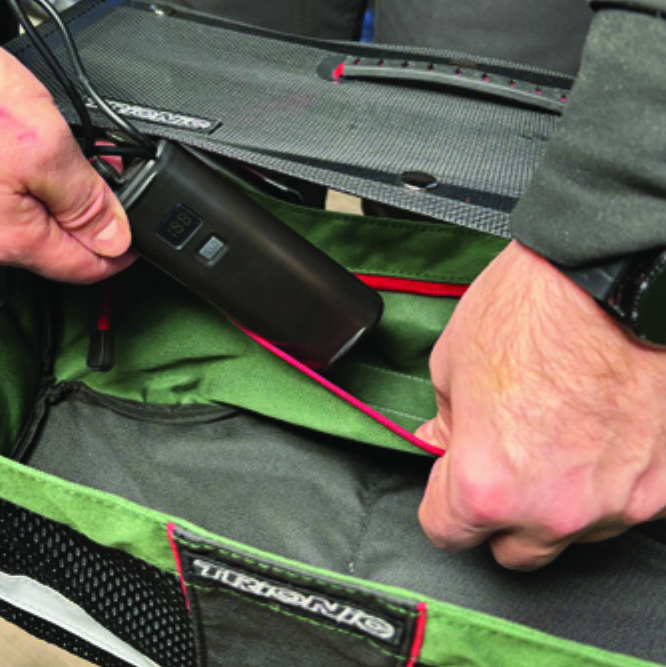
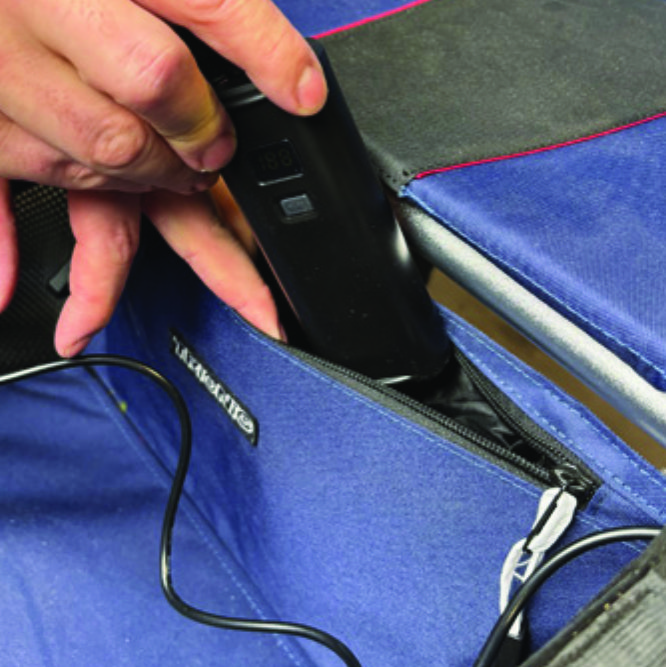
Place the battery pack in the rear zippered pocket of the basket.
A10. Place the battery pack in the rear zippered pocket of the basket.

Instructions for a Veloped

Run the longer extension cable along the U-shaped grip bar of the Veloped and secure it with the included velcro strap.
B8. Run the longer extension cable along the U-shaped grip bar of the Veloped and secure it with the included velcro strap.
You can cut the excessive length of the velcro strap with a pair of scissors.
B9. You can cut the excessive length of the velcro strap with a pair of scissors.
Place the battery pack in the rear zippered pocket of the basket.
B10. Place the battery pack in the rear zippered pocket of the basket.

The package contains

The package contains

How to operate the light

How to operate the light

Product Reviews    

  • Exactly what we were looking for!!…

    The first thing I bought was the Veloped Tour version for my mother and I was very pleasantly surprised! The quality is a laugh compared to the rollator you are currently using. Now I have commissioned the second one for my father. I will definitely …

  • A new life after 7 years…

    I've only had my Veloped a week, and every day I've taken small excursions around the city and the running track… After TBE and meningitis, my balance is not as it used to be, on top of that I have foot arthrodesis that hasn't healed, so in 3 years I…

  • Best friend…

    I miss my super strong legs, being able to walk many kilometers in forest terrain without getting tired. Being able to go for long, long walks with my dog. Being able to walk with long strides and enjoy nature.
    I will never walk that fast again, but…

  • New Lease of Outdoor Active Life…

    This walker is everything I hopped it would be. It makes access to rough uneven terrain easy because of the inflatable tyres.. For me with arthritic shoulders I find it makes walking using this walker virtually pain free. It attracts interest from ot…

  • Walker 14, the more autonomy…

    My husband has serious balance problems due to a progressive neuropathy, walking with a cane is too hesitant to take walks, the Walker 14 from Trionic solved this problem because it also allows to take stony and grassy paths. Even if the price is hig…

  • Very pleased with my spare parts!…

    We installed the brake cable to my rollator. It was quick
    and easy, as it fit perfectly. I would definitely recommend it again if needed.

    At the same time, I would like to thank Trionic for the excellent products,
    from the rollator itself to the…

  • Veloped - a great product…

    Very good advice before buying. Super quality and ingenious handling of the Veloped. Overall, a great product.…

  • The Out Door Champion.…

    I have tried locally available walkers and found them ok on flat, level and smooth surfaces any cracks or bumps they, like super market trollies in the car parks, go their own way.
    I went to the internet and googled "All Terrain Walkers" and up came…

  • Excellent product…

    This has been a life-changer for me. I suffer from a back problem, which seriously restricted my walking. Using the Trionic Trek I can comfortably walk about 2 miles. I take the occasional rest using the seat which is a bonus. The design and finish o…

Subscribe to our newsletter!